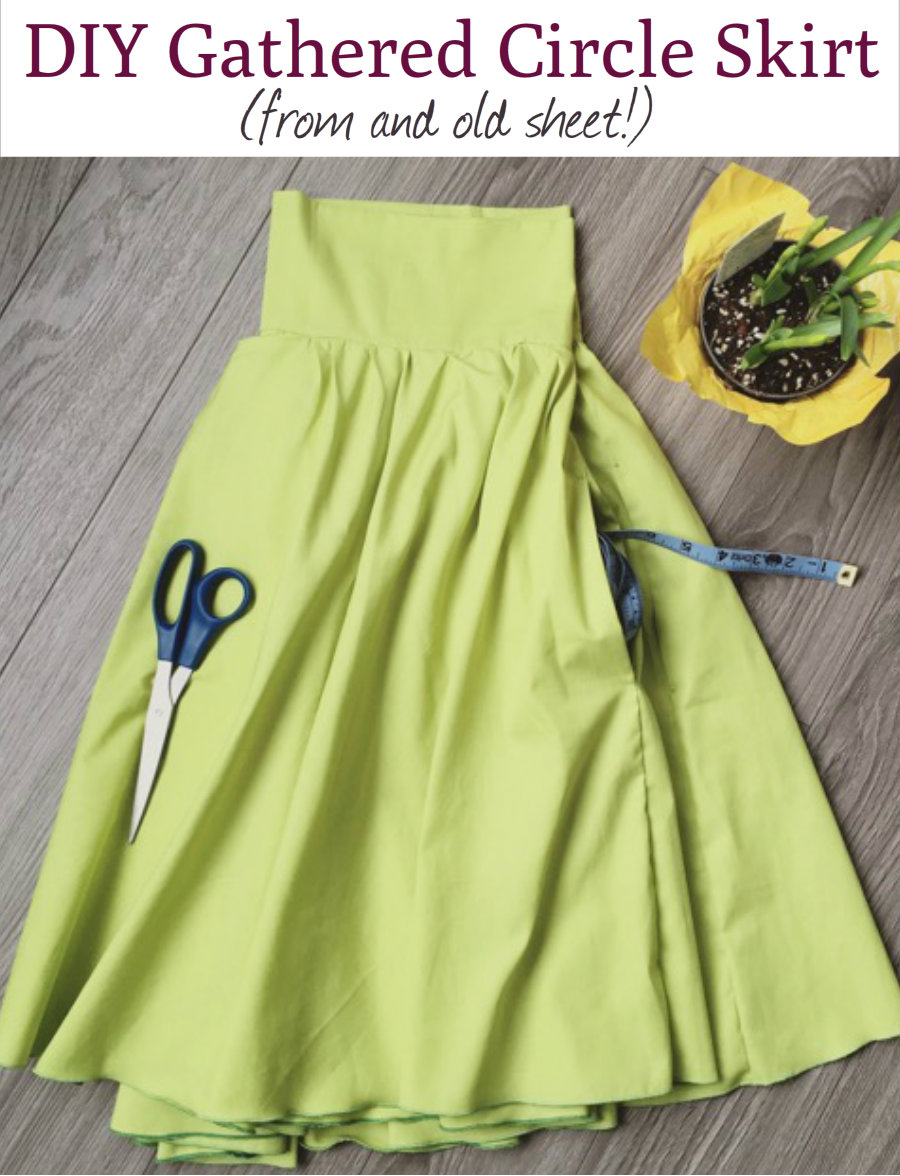
Spring is in the air! It’s barely March but we are having some great weather here. Snow is melting, the temperature is in the single digits, basements are flooding (yes, the basement in our brand new house flooded a few weeks ago). Anyway, it’s beginning to feel like spring to me and nothing feels more spring than a nice full skirt with pockets and as every woman knows, pockets are the most important part of any dress or skirt.
I wanted a nice gathered circle skirt but I’ve actually never made one before so to test out my design I grabbed an old cotton sheet (but in good condition), some dental floss and a zipper and whipped this cutie up!

I took some pictures along the way so I thought I would share my process for those of you who were interested in making your own.
**NOTE: This pattern is being drafted using a 1/4″ seam allowance**
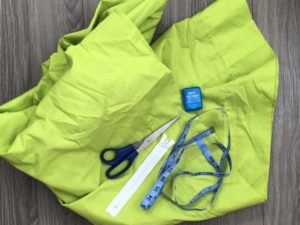
1. Gather Materials:
- Measuring tape
- A flat sheet (I used a full flat sheet) or 4-5 yards of woven fabric.
- Scissors
- Pinking shears
- A 7″ zipper (invisible zipper would work best but I didn’t have any on hand)*
- Dental Floss
- Optional: Interfacing for waistband
- Sewing machine & coordinating thread
- Print this PDF Worksheet: Apple Tree Sewing Skirt Worksheet-download
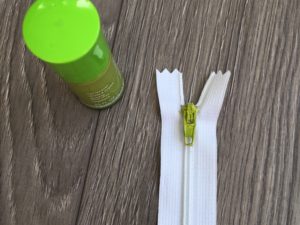
*If you don’t have a matching coloured zipper, you can try using nail polish to help match!
2. Measure:
a. Measure your waist circumference where you would like the bottom of the waistband to sit. Measure loosely as there is no ease added to the waistband.
***All of the measurements are relative to the waist location, so you may wish to tie a string or ribbon around your waist and measure from there to ensure accurate measurements***
b. Measure your desired skirt length from your waist (where you just measured) to the hem and add your hem allowance.
c. Measure the pocket distance from your waist to where you would like the pocket to start.
d. Measure the waistband height you would like.
3. Calculate:
Math Time! Don’t worry, it’s easy if you have a calculator 😉
a. Waist Radius of Skirt:
- Take your waist circumference (as measured in 2a) and multiply by 1.75 if you would like your skirt as gathered as mine (multiply by 2 or 3 if you would like more gathers).
- Divide this number by 6.28 (or 2π).
- Subtract 0.25″ (your seam allowance).
- Convert the decimal into a usable measurement. There is a webpage that will do this for you (and explain it to you) here.
b. Skirt Hem Radius:
- Your ‘waist radius of skirt’ + ‘desired skirt length + hem’
c. Waistband Height:
- 2 x ‘desired waistband height’ + 0.75″
d. Waistband width:
- ‘Waist circumference’ + 0.5″
4. Draft the Pattern (on your fabric) & Cut:
a. Fold the fabric in quarters as shown below.
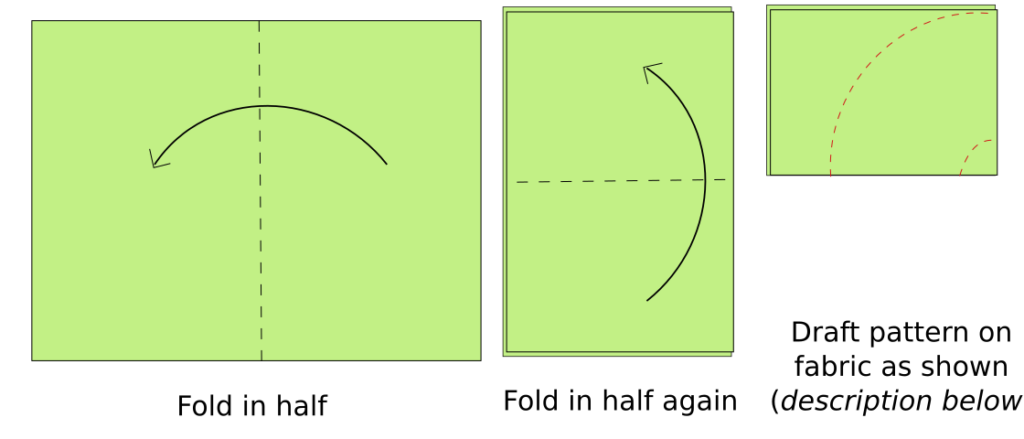
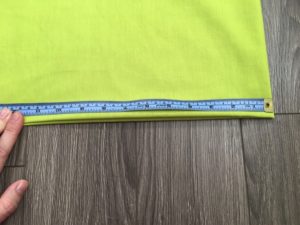
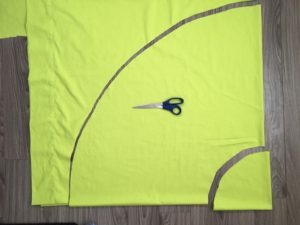
b. Align the end of your tape measure with the folded corner of your fabric. Measure along one edge and mark the measurement you calculated as the waist radius of your skirt (from step 3a).
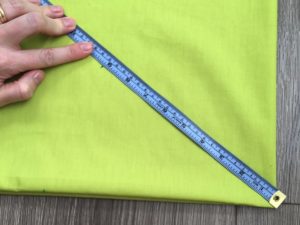
c. Rotate your tape measure slightly so the end of your tape measure is still at the folded corner, but the measurement marking is further in from the edge of the fabric (as shown below). Continue this process until you have several markings, creating a quarter circle with the folded corner of the fabric being the centre of the circle.
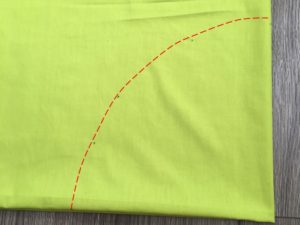
d. Now repeat the process in the last step but using ‘skirt hem radius’ (3b). This will create a new quarter circle, with the centre again at the folded corner. This should result in the distance between these two circles being the desired length of the skirt.
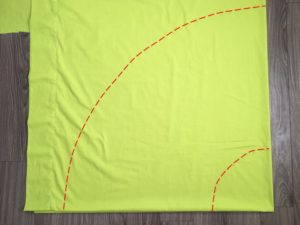
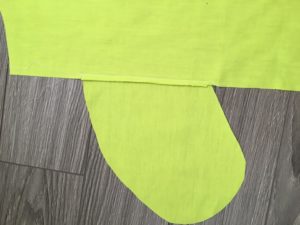
e. Cut along your marked lines to create a donut shape.
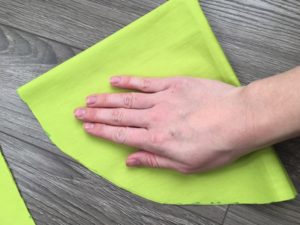
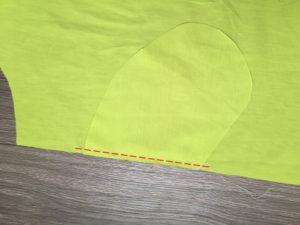
f. Trace your hand at an angle over four layers of fabric to create the pockets. Cut to create the pocket pieces.
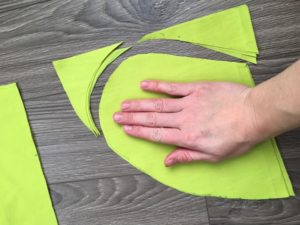
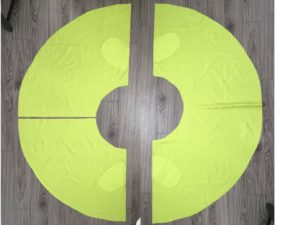
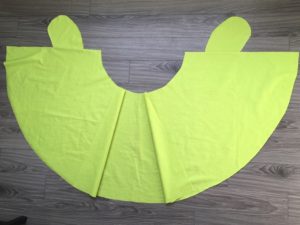
g. Cut your circle in half and then cut one of those halves in half. This will create the side seams for the pockets and the back seam for the zipper. You might find it helpful to mark the centre of the front skirt piece (at the waist).
5. Sewing
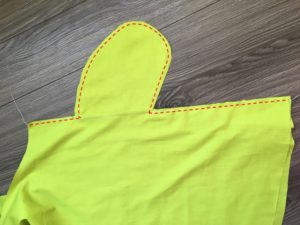
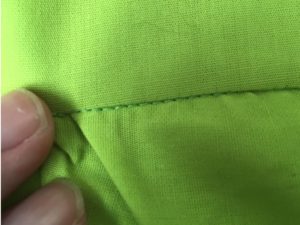
a. Pin your pockets along the side seams (right sides together), placing them the correct distance from the waist as measured in step 2c. Be sure your pockets are pointed downward.
b. Sew the pockets to the side seams, starting just before the pocket begins and ending just after the pocket ends.
c. Press the pockets outward.
d. Place the back skirt pieces on top of the front skirt piece (right sides together) aligning the side seams and pockets.
e. Sew along the side seams, sewing around the pockets.
f. Press your pockets towards the front of the skirt.
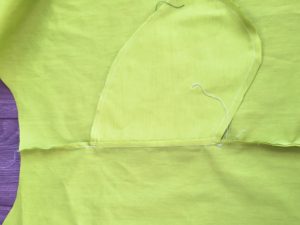
g. Tack the top and bottom of the pocket opening. This is to keep the pocket pointing towards the front of the skirt.
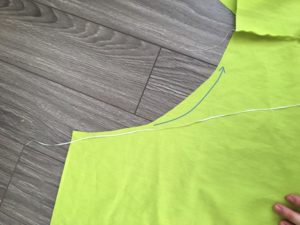
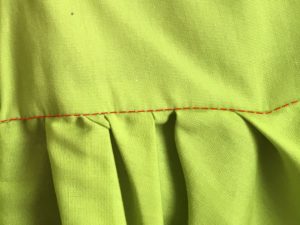
h. Zig zag stitch over the dental floss along the top of skirt piece. Try to stay within the 1/4″ seam allowance. Make sure you do not catch the floss with your needle, as you will be pulling the floss through the zig zag stitches.
i. Cut a rectangle for your waistband using the waistband height (3c) and waistband width (3d) calculated numbers.
If you would like a more professional look, attach interfacing to the bottom half of the waistband, leaving a 1/4″ around the edges.

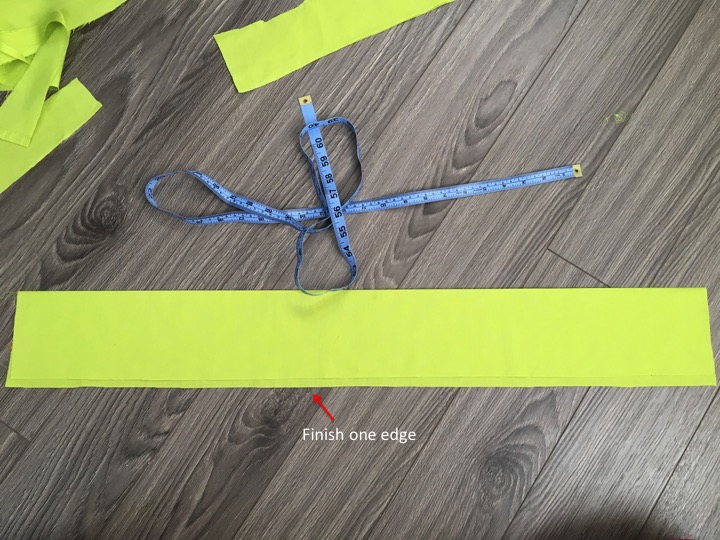
j. Finish one of the long edges of your waistband. To do this you can use a serger, pinking sheers or hem (keeping in mind there is only a 1/4″ seam allowance here).
k. Fold the waistband in the long direction (hotdog style 😉 ) leaving the finished edge peeking out 1/4″.
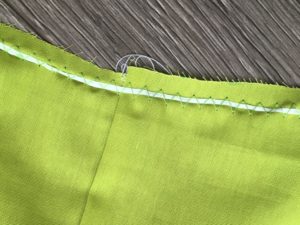
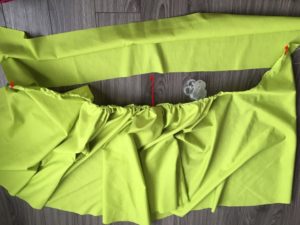
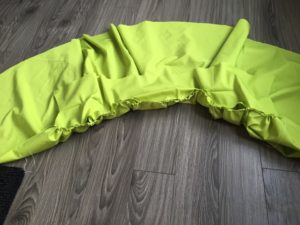
l. Gather the skirt by holding on to the ends of the dental floss and pulling the fabric evenly towards the centre. Pin the ends and centre of the skirt to the unfinished edge of the waistband (right sides together). Try to gather the fabric evenly along both halves while you finish pinning the waistband to the skirt.
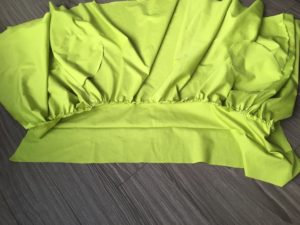
m. Sew the waistband to the skirt. Remove the dental floss trim the seam with pinking shears and press the seam towards the top of the garment.
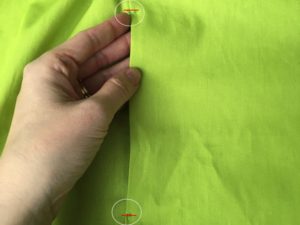
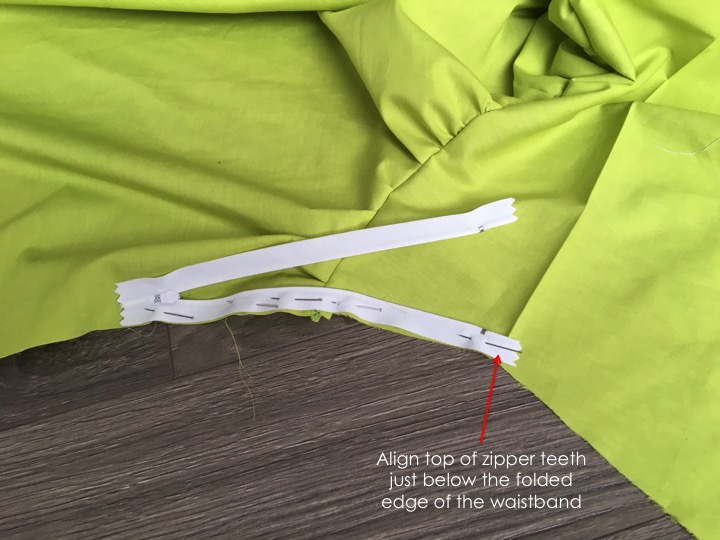
n. Attach the zipper. If you are using an invisible zipper make sure you cold press the teeth out and use an invisible zipper foot. There is a great invisible zipper video here. The process is roughly explained below but watching the video might be helpful.
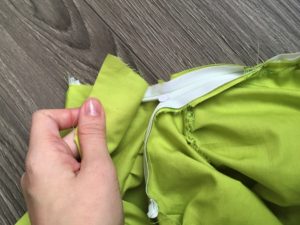
- Place the right side of the zipper to the right side of the skirt, aligning the edges as shown below.
- Fold and pin the top of the zipper toward the outside of the seam so it is out of the way.
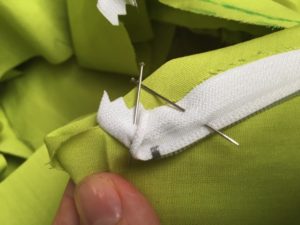
- Repeat for the other half of the zipper on the other side of the skirt.
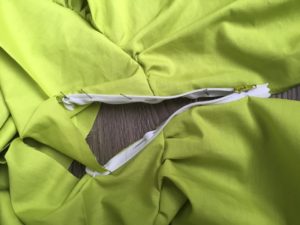
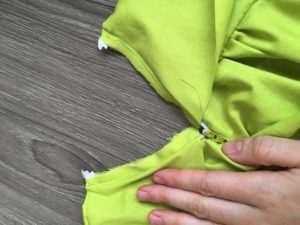
- Sew the zipper in place sewing as far down as you can (stopping at the zipper pull).
- Fold the zipper in half pulling the bottom out of the way. Sew the back seam starting where you finished off sewing the zipper and continuing on to the bottom of the skirt.
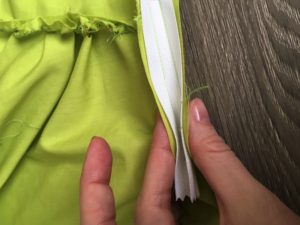

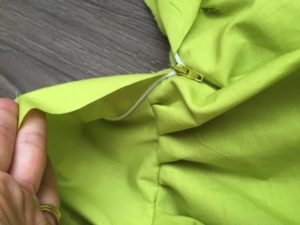
- Press the seam then fold the waistband over the zipper so the right side of the back of the waistband is touching the right side of the front of the waistband and wrong side of the zipper tape (repeat for both halves of the zipper). The tape of the zipper should be sandwiched between the waistband.

- Flip the back of the waistband around the zipper.
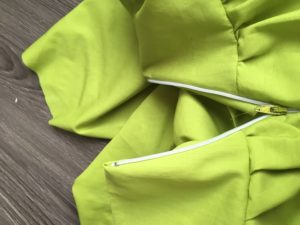
- Zip up the zipper and press again.

o. Stitch along the waistband/skirt seam, trying to stitch exactly over the seam. This is to catch the back of the waistband and hide the unfinished seam inside the skirt.
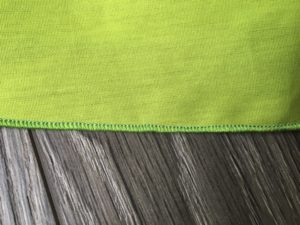
p. Hem the skirt however you’d like. Two options are folding over twice and stitching along the edge of the folded section, or using your serger to do a rolled hem.


And your done!

Share your creations in the comments, by tagging @appletreesewing on Instagram or in our Facebook group (https://www.facebook.com/groups/appletreepatterns/).
Great work!!! Fabric fit so good too i couldn’t guess it made from old cotton sheet. Thanks for the good explanation.